Table of Contents
Eagle cadsoft
This page is about using libraries with Eagle1) Cadsoft, a computer program which helps designing schematic diagrams (schematics) and circuit boards (pcb)2).
Custom Libraries
During a design process it is sometimes necessary to add components which are not available in the ready supplied libraries. For this, components can be created manually and imported in the design. The method for this requires some fundamental understanding how components are organized in Eagle, both in the application itself as on disk. Guidelines about library design and recommendations how to use consistent nomenclature should help a user to successfully manage such collections of components, upgrade or extend them with other packages.
Libraries within Eagle
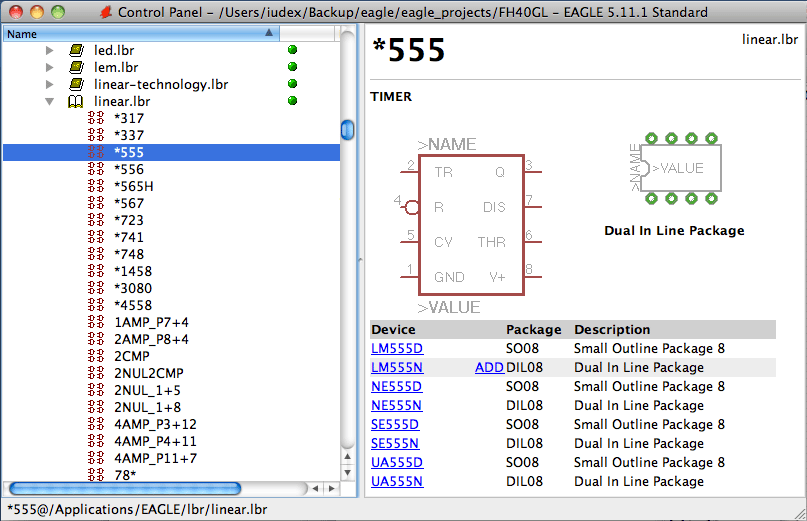
In the Control Panel within Eagle, library folders contain files with IC manufacturers, group of generic components or group of specific symbols (Like ground, power supply and drawing frames). Eagle treats each of these files as a library, containing devices 3) or device sets4). If a library is available in Eagle and opened5) one will observe that a selected device or device set has primarily three entities:
- Device: The real component, residing in a specific package with a specific symbol.
- Package: Footprint in the layout
- Symbol: Drawing in the schematic
Each of these entities characterize a specific aspect of a component or component breed. The image below shows a selected library with the 555 timer IC component breed (Or in the Eagle jargon called device set).
Recommendations from Eagle for File Locations
The default location for libraries which are created when installing Eagle, can be found when clicking on Options→Directories. On OSX, this is in $EAGLEDIR/lbr, where $EAGLEDIR represents the application installation directory from Eagle. Eagle recommends to keep this directory unchanged, as software updates may overwrite files in this folder.
Your own libraries should therefore be at another location. A suitable one would be in a subfolder within your Eagle projects folder like the following structure:
- $Home/Backup/eagle/
- eagle_custom_libraries
- dev_mylibrary1
- dev_mylibrary2
- eagle_projects
- Arduino
- PowerSupply
- etc.
In order to make Eagle aware of the main custom libraries folder, just add the directory in Options→Directories. Any subfolders within this folder will be automatically used as well. For example:
$EAGLEDIR/lbr:$HOME/Backup/eagle/eagle_custom_libraries
While configuring the libraries folder, one could do something similar for the projects folder:
$HOME/Backup/eagle/eagle_projects:$EAGLEDIR/projects/examples
If none of the libraries appear when adding a part, verify in the control panel at Libraries if the default libraries are enabled. To do this, in the control panel right click on a library and if not enabled, select Use.
Design process
Before the practical designing can be done, consideration should be made for a naming scheme. A consistent nomenclature will keep custom libraries in a healthy state.
Nomenclature
A consistent naming scheme can be best explained with the following example:
| Library Folder | → | Library | → | Device(s) or device set(s) |
|---|---|---|---|---|
| $HOME/Backup/eagle/eagle_custom_libraries | → | dev_marc.lbr | → | …, *555, NE5534, LM385, … |
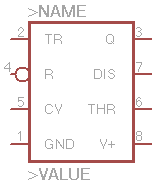
If we now look closer to the *555, we can draw the following scheme:
On the left side from the device set, we see a symbol from the timer IC. On the right side we see a list with devices and their packages. For each device within a device set, Eagle designates a different package to a separate device.
The placeholder '*' is not ideal because it also refers to devices which contain the number 555 but are not timer ICs. A better example can be made for example with an LM385 voltage reference diode:
| Library Folder | → | Library | → | Device(s) or device set(s) |
|---|---|---|---|---|
| $HOME/Backup/eagle/eagle_custom_libraries | → | dev_marc.lbr | → | …, *555, NE5534, LM385, … |
If we now look closer to the data sheet of the LM385 or adjustable (LM385-adj), we see it contains one symbol with 3 pins and another with 8 pins, depending on the kind of package. With that information we draw the following scheme:
Component custom design
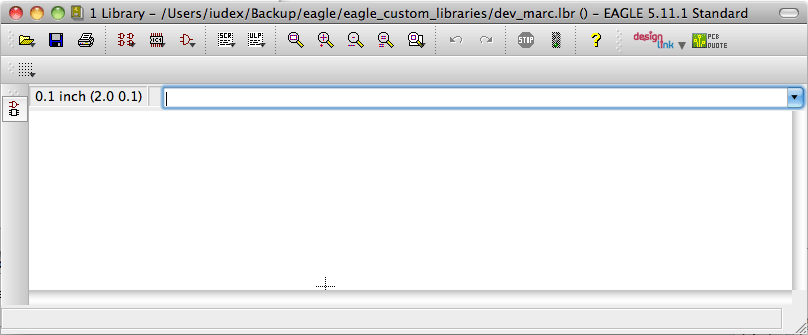
A component must reside in a library. Therefore, to create or edit existing components, either -from the control panel- create first a new library or open an existing one via the menu. This will invoke the Library Editor window.
In this window, from left to right you will find these basic commands:
- Edit a drawing: With this button you can load a device or package for editing
- Edit a device or device set: In this window you do not draw anything, but only define which Package is used, which Symbol(s) is/are used (called Gate within a Device), which names are provided for the Gates (e.g. A, B), which technologies are available (E.g. 74L00, 74LS00, 74HCT00), whether the Device has additional user-definable attributes, whether there are equivalent Gates which can be interchanged (Swaplevel), how the Gate behaves when added to a schematic (AddLevel), the prefix for the component name (if a prefix is being used), whether the value of the component can be changed or whether the value should be fixed to the Device name, which pins relate to the pads of the Package (CONNECT command), whether a description for this component should be stored in the library.
- Edit a package
- Edit a symbol
A device, device set, package or symbol can be removed from a library via the Library menu. To remove, you must open that device in the type Library Editor window first and then select from the menu the option Library → Remove… and enter the name which refers to what you want to delete. (The package, symbol or device.) If it stills shows up in the concerning Library in the Control Panel, save the Library with the removed item.
Links and more information
- https://learn.adafruit.com/eagle-tutorial-how-to-add-a-new-package-to-a-component/ How to add a new package to an existing component
Please note that the definition of device sets is not very clear. A closer match would be device breed, which specifies more precise that devices which belong to the same breed share a common function.


